Monday, May 30, 2011

Balloon Brigade

I've been filling some balloon orders so it got me in a cutting mode to get some fresh ones done (I need more star sets, too, but that's another matter). But it's always fun to see what mixing and matching will create for fun balloon designs. I have been putting them on the wall but a few I have added a cotton string to hang from the ceiling or take a bamboo skewer and wrap your balloon around it to insert them into an arrangement. Smaller balloons would be cute in a card as a pop-up design or on the front! You might find other uses as well.


In the photo above I cut a page of smaller balloons in a variety of sizes just to be flat silhouettes on a wall or table.


Have fun and cheer up a room with this simple file...in case you missed it the first time I posted it the file is here.
Let your imagination soar! Happy Cutting!


Tuesday, May 24, 2011

Text on a circle in Inkscape


Putting text on a arch or arc, on or in a circle is often asked so I will share some ways to accomplish this in Inkscape. I've used this method in 0.46 as well 0.48. I will assume you know very little about Inkscape, so you may want to skip through some of the explanations.

From the sidebar menu select the circle tool
and draw a circle. If you want it perfectly round use the control button. Then select the Text tool.


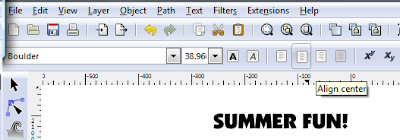
and type your copy. While in the text mode check the tool bar above and select "Align center".


You should have two elements like this...


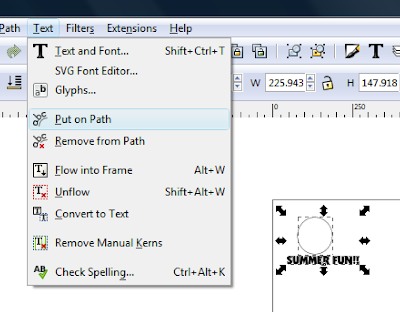
Select both items and go to the Text drop down menu and select Put on Path.


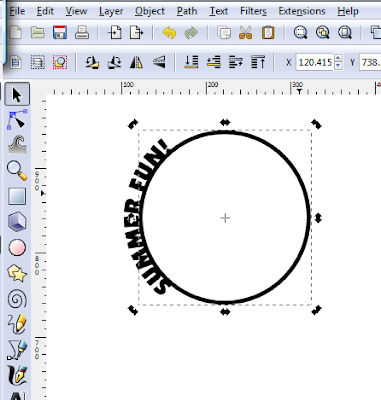
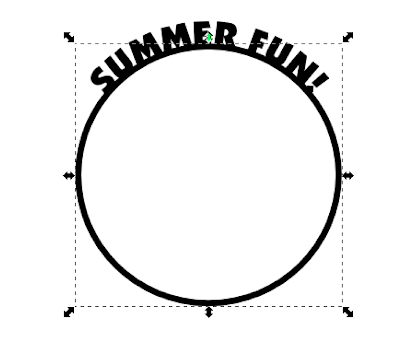
Click twice on the circle only to get the rotating handles as shown, then use the control key and mouse to move it to the top.

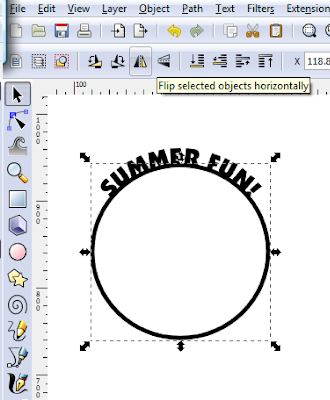
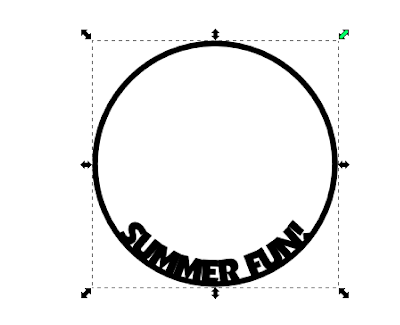
If you want the words at the bottom, select your circle and go to the icon above that will say "flip selected objects horizontally" when you mouse over it, select it and your text will flip over.


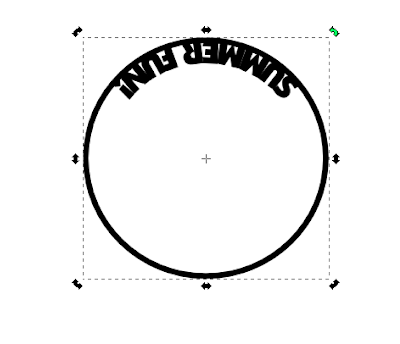
The next step is to click on your circle to get the rotating handles as shown here. I grab it and use the control button to turn the text to the bottom. Using the control keys moves it in controlled segments so it's easy to see when you have rotated 90 degrees (you will see the degree of movement at the bottom of your screen in Inkscape) though you can turn without using the control key, too.


The second way to move the text (and you won't believe how easy it is!) is to simply grab the center arrow as higlighted here by the "E" and just pull it down. The only downside to this method is the integrity of your circle but it allows you to creat an oval shape, too.


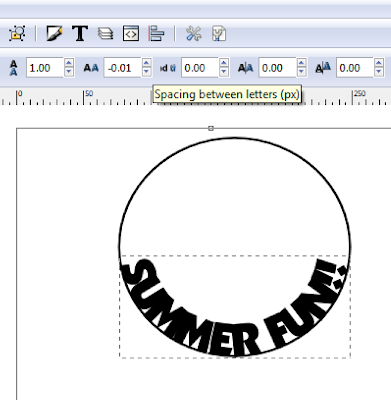
You may also resize your circle for different effects and you can also adjust the size of your copy. Double click on it or use the text tool, then highlight and type in a new size until you like what you have.


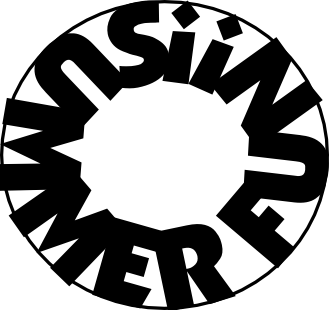
You can also increase or decrease your space between the letters using the alt key and the right and left arrow keys. The arrow keys also allow you to move back and forth between the letters.


Moving the circle allows you to create an oval if you prefer...once you learn to use this feature you will find it to be a real time saver.


To save the image for cutting purposes, I like to ctrl + d to duplicate the text, from the Path menu, select Object to Path and then follow the steps below...


In the same menu, select Break Apart


Now we need the hole back in the R so select both parts of the R and use the Difference


Now select all of the elements, and apply Union. Happy Cutting!


Monday, May 23, 2011

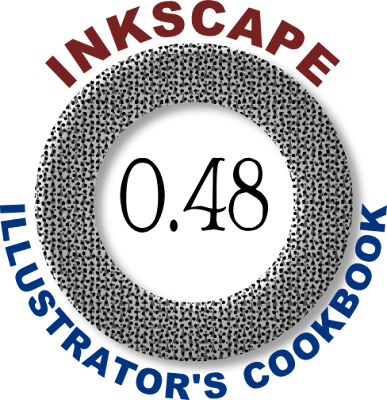
Inkscape 0.48 Illustrator's Cookbook Review


For the past few weeks, I have been trying out the "recipes" from the Inkscape 0.48 Illustrator's Cookbook. It guides you through using basic features of this open source drawing program as well as more complex applications for vector graphics. I've learned about many features that inspire creativity and ways to achieve more complex designs by combining what you learn regarding layers, editing colors, using the shape tools, manipulating text and cloning, to name a few. A number of illustrations are included to help you see what effects can be achieved for each graphic.

After stepping through the basics, they explain how each feature works and how you can expand your use of it. One of my favorite menus is the SVG Filters. There are many preset designs that allow you to create many fun, professional and unique design effects as well as customizing them for your projects.


My only critique- some directions aren't complete enough. For instance, on page 30 the directions for "text on a path" present simplified instructions which may get you through the upper text, however, people often ask how to reverse the direction of the text (like ILLUSTRATOR'S COOKBOOK as shown in my sample above) and the recipe is missing a few ingredients so it won't give the results illustrated without a few extra steps. Occasionally some directions didn't work for me like the Shift + R to reverse the path direction. Could be a bug or (gasp) user error.

Like any good cookbook, I've got some favorite recipes marked that I will use again and again. I would recommend this book for both the beginner and experienced user. There are many features that simplify the design process.

There is a pdf version of the Inkscape 0.48 Illustrator's Cookbook available which is convenient to have right on the computer but honestly, for me, there is nothing better than a real book in my hands. Either version (or better yet, both!) will be worthwhile to your Inkscape design experience as you create your own design "recipes".

I have been a long time fan of Inkscape and was delighted to review this book. I am in no way affiliated with the publishers or authors of this book, just a user of a great program available free to all! The book is available here . Thanks for visiting!

Monday, May 16, 2011

Connect the dots!

How fun is it to create your own special connect the dots image! Inkscape makes it easy. I'll show you this "recipe" from page 163 of the Inkscape 0.48 Illustrator's Cookbook.

I'm having a blast trying out some of the features and this is an easy one! You could try it with a simple svg file. I used the silhouette of my dad but for this purpose I eliminated some of the from my original file for this project. Also you may see areas where you want to add nodes. I just open the node edit tool from the side bar (the second tool) and then I double click where I want to add nodes. Or if there may be too many and you may want to delete or move a few.



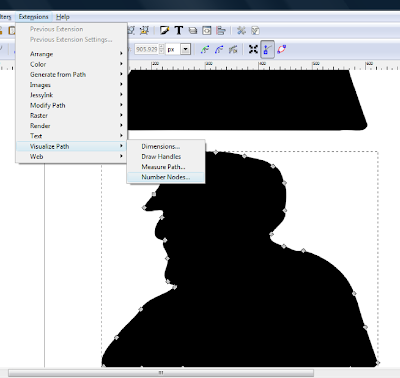
My image is selected in the node edit mode as shown, then I go to the Extensions drop down menu, follow the arrow for Visualize Path and select Number Nodes


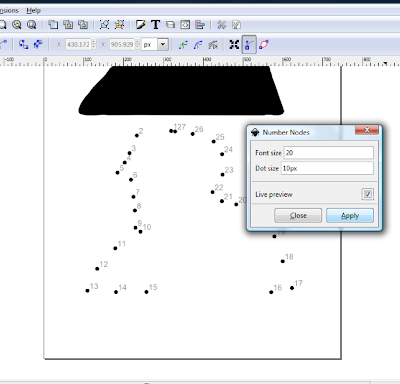
I selected "Live Preview" so I can see how it looks. You can change the size of the font and the dots. Type in a different size to change. My samples changed automatically, if not, press Enter. You can continue to tweak it until it looks right for your project, select Apply. You will notice in my two samples they are different sizes. I need smaller ones for the second design.



The only problem I noticed was the first and the last dot numbers land on top of each other in my second sample so after I created my image I ungrouped it to move my overlapping numbers. I haven't printed one yet but will do so soon.


Have fun!


Friday, May 13, 2011

Congrats! Congrads! Editing text in Inkscape 0.48

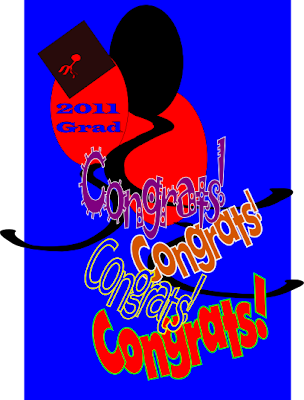
  I was practicing editing text in Inkscape 0.48 and wanted to share the end results as well as sharing how to move text around easily. The samples below show the text after moving it either closer, up and down or rotated.

The only rotation I did is on the bold red text and just the "C" and the exclamation are rotated. To do that, I select the text tool and type my copy. I use the arrow button to get over to the front of the letter I want to rotate and use alt key and [ to rotate counterclockwise and alt and ] to rotate clockwise. You will notice the letter seems to high and you will want to lower it so to move the text vertically (raise or lower)use the alt and arrow keys up or down. To move the text horizontally (closer or further apart) use the alt key and the arrow keys right or left.

The main advantage to doing this in the text mode is that you are able to save the spacing and try different fonts. I like to duplicate and have several on the page to see how I like them and in the samples below I decided to use several styles. When changing fonts it may need some additional adjusting to get the letters touching depending on the weight and style of the font. When saving to create a cuttable svg file...you need to change to go the the Path menu and select Object to Path. It will then show your line of text as a group (in status bar at bottom of the page) so then go to Object menu and Ungroup. Then back to the Path menu and use Break Apart. If you have letters with a center like o,p, d, a, etc., it will turn solid and you will have to draw around a box around the two parts of that letter with your select tool (the arrow) and in the the Path menu select Difference and the hole will be restored. (If the letter disappears, select Undo from the Edit menu. Go to the letter and select it again only the large part of the letter, hit the end button or go to the object menu and click on Lower to bottom then select the two parts again select Difference and the letter with its center should appear correctly). After working with the letters, I select the whole line and in the Path menu select Union. It may look unnecessary to do the break apart, difference and union because fter ungrouping, it looks like you should just be able to select union...but often importing into scal it will displace parts of the lettering so the extra steps seem to correct this. Occasionally there may still be a letter that doesn't look right. I'll go back again and select the whole line and try Union again. That does seem to be a snafu with 0.48 compared to earlier versions of Ink. If you have any trouble with these files please let me know! The picture below includes my words with an svg from Sandy on the scal (Sure Cuts a Lot) forum. She drew the graphic with the grad hat and balloons...that file is available here! There is another version she created in that post, too! Thank you Sandy!

File is here!
You will find both Congrats! and Congrads!
Congratulations if you survived reading this post!


Tuesday, May 10, 2011

Baby

Photobucket

BABY on a curve

In Sayings and Phrases (eighth post)

Star in a star

A file from playing with the star tool in Inkscape 0.48. I did do some editing but it gave me an easy start to create this design.

Photobucket

File here (4th post)

Monday, May 9, 2011

Inkscape 0.48 Illustrator's Cookbook - Star tool


So, I have been perusing the Inkscape 0.48 Illustrator's Cookbook which presents a number of fun design "recipes" but the ease and diversity of this tool will keep you mesmerized and feeling like a real artist. I decided to keep the files in black and white so the focus could be more on the variety of design options. Once you start it will be hard to stop!


If you are interested in this book you can find it here along with a link for a sample chapter to download at the top of the page. I will be sharing more as I try different tools from this book. And while there is a pdf version available I love having a real book in my hands so I have it at my side for easy reference. The side bar is where you can find the star tool and the shot below shows options that will appear at the top of the page. You can adjust how many corners you use. My samples range from four to six corners. As you click on some of the other options you will see your image change. Spoke ratio and Rounded will keep more symmetry to your drawings but using the Randomized will give it wildly different looks. It's all quick and easy!

TIP - You can reset your star by clicking on the paintbrush icon next to the Randomized button (thanks gj1 for pointing that out).


You can also change your image by grabbing the one of the two nodes and moving them around...it's a blast! You can also try holding the control key while dragging the nodes. It will bring out the Picasso in you!