

My previous post showed several stars I've made lately out of 12x12 scrapbook paper so if you are interested in folding one, I've tried to explain the process here. Using the full sheet of paper the star measures approximately 17" and has a depth of about 5". Thinner papers will be more fragile and you may want to glue it to a heavier stock. When assembling and gluing my star I use rubber cement because it gives me time to get my paper in place. I've also added a bell-shaped jewelry finding with a loop that protect the tips of each star and gives the option to hang from any point. I use a general adhesive (in this case, I had 527 multi-purpose cement) to attach the finding to the paper. If my instructions are not clear, please let me know.

Fold on a diagonal and unfold.

Fold corners in as shown.

Fold in the other points as shown

and then unfold and turn over

Bring the two points together and crease paper on fold line.

Unfold and turn over. Your creases should look like this.

This might seem a little confusing but we need a diagonal fold so fold in the flap closest to you.

Below the photo shows where we need to crease as I've tried to explain above. Crease only halfway to the center fold line.

The goal is to create this triangular creases as shown below which has been folded from both sides.

Turned over you should have these creases.

The lower part of the star segement will be folded together and you will see why we needed the last folds.

You should have a segment like this

Repeat four more times.

The narrow striped segment will be turned up and wrapped by the larger open upright flap...study the photos to help see how to assemble


The outer flaps will also tuck in just a little too. I spread my rubber cement on the narrow part and position the wrapped outer part from the first segment around it.


Continue around.


With all the papers out there the options are plentiful! Have fun!


 Fold on a diagonal and unfold.
 Fold corners in as shown.
 Fold in the other points as shown
 and then unfold and turn over
 Bring the two points together and crease paper on fold line.
 Unfold and turn over. Your creases should look like this.
 This might seem a little confusing but we need a diagonal fold so fold in the flap closest to you.
 Below the photo shows where we need to crease as I've tried to explain above. Crease only halfway to the center fold line.
 The goal is to create this triangular creases as shown below which has been folded from both sides.
 Turned over you should have these creases.
 The lower part of the star segement will be folded together and you will see why we needed the last folds.
 You should have a segment like this
 Repeat four more times.
 The narrow striped segment will be turned up and wrapped by the larger open upright flap...study the photos to help see how to assemble
 The outer flaps will also tuck in just a little too. I spread my rubber cement on the narrow part and position the wrapped outer part from the first segment around it.
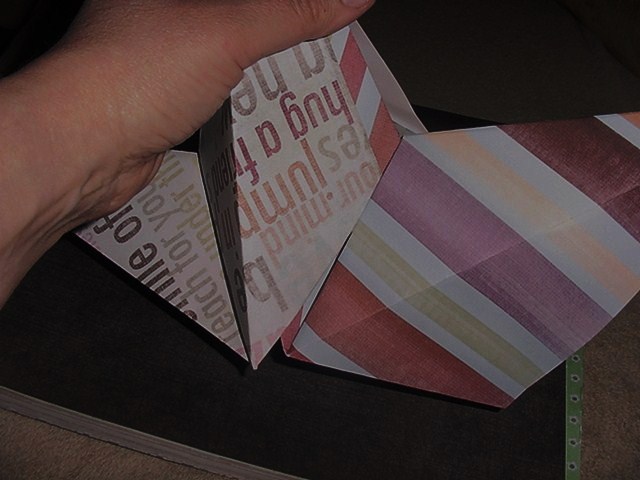
 Continue around.


 With all the papers out there the options are plentiful! Have fun!


