Thursday, August 27, 2009

Wearable Art details


In my haste to post my Wearable Art I neglected to mention that I used my Cuttlebug embosser on the earrings and now on the larger hat flower. I also used Kryon Clear Glaze to coat the elements to increase stability and give them a better look. It's a challenge to photograph due to the high gloss but I'm pleased with them. The glaze will require at least two coats on matte or flat finished cardstock.

Monday, August 24, 2009

Art Imitates...well, a shoe!


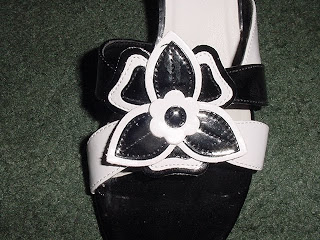
For many of us, inspiration comes from many places, so in this case I only had to go to my closet! I have a favorite pair of black and white shoes with a great design on the front so I decided I should reproduce it and create some wearable art for the days I want to be matchy-matchy!


I sprayed the earrings with Krylon Clear Glaze to protect and prolong their life. I recycled some old earrings and glued my design over the top of them. I wear lots of black and white so it was an obvious choice but the choices are endless!


The first large design I had intended to be made
into a brooch or pin but it was a little too big
so then I decided it might be a perfect size
for one of my many hats!


The file has the three elements as shown below. I love using Inkscape to create my designs. To make the earrings,in my scal program, I set the "keep proportion" button and then selected 2" for my width. I cut the black as seen below and I used "Blackout" for the solid white background. I cut two blackout sets to go with the one black set and used the positive and negative parts to create two sets of earrings...waste not, want not!

File here!


Monday, August 17, 2009

Think Outside the Stamp

While I enjoy my cricut and all I can do with it, I have lots of great decorative stamps that I like to utilize. But there are some simple designs I picked up at the dollar store a couple of years ago that are generic but can be easily embellished and would allow children to add their own artistic flair and imagination to their creations. Here are a few basic shapes...


Using a fine point Sharpie, it's easy to add some details
and take a generic stamp and give it some life...this one could easily be a cute bow, too!


This basic flower is shown using a thin sharpie...


and a thicker one...it's pretty forgiving. I try not to be
too picky about how I draw the details.


In these examples I used the heart shape to create a larger butterfly. The extra wings were stamped and cut out. The space inbetween them I added a little black so it would match the body of the butterfly and glued it on after slightly rolling the wings around my skinny sharpie.


I also breathe on the stamp and can get a couple of lighter images out of it, too which are just as pretty. I used the lighter color for the top wings.

Even more detailed stamps can be tweaked
by adding an extra touch...


Simply Bookmarks


I have to say how much I like the simple but classic look of the Plantin Schoolbook bookmarks...my favorite way to do them is with a black background on a green border. The letter colors are either scrapbook paper or a part of a magazine page with interesting colors. I love the colorful mini tassels though I can't find them anymore...*sigh*...isn't that the way it is, you like something and then it's discontinued! Ugh!! Well I'll use what I have, no point hoarding them.

I also can't resist adding a little more texture by running the bookmarks through the cuttlebug with a couple of my favorite embossing patterns! Love the swirls!

Tuesday, August 4, 2009

Build-a-Fish

Okay, the Cuttlebug die and embosser actually calls it Build-a-Flower but I thought I might be able to make some unique fish with the shapes as well. Flowers and dragonflies are a natural with these fun and pretty designs but I'm feeling a little fishy!


I cut the tails by hand, added some details with a fine point sharpie and some jewels for eyes. I also modified one of the scalloped design for the one fish...there really is a lot of potential for variety!