Monday, May 16, 2011

Connect the dots!

How fun is it to create your own special connect the dots image! Inkscape makes it easy. I'll show you this "recipe" from page 163 of the Inkscape 0.48 Illustrator's Cookbook.

I'm having a blast trying out some of the features and this is an easy one! You could try it with a simple svg file. I used the silhouette of my dad but for this purpose I eliminated some of the from my original file for this project. Also you may see areas where you want to add nodes. I just open the node edit tool from the side bar (the second tool) and then I double click where I want to add nodes. Or if there may be too many and you may want to delete or move a few.




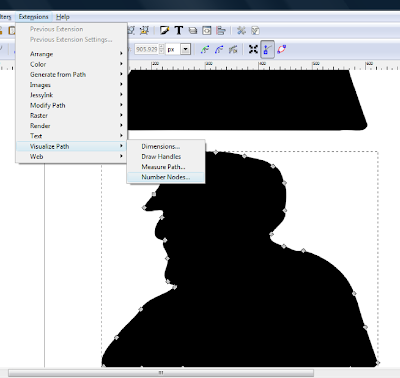
My image is selected in the node edit mode as shown, then I go to the Extensions drop down menu, follow the arrow for Visualize Path and select Number Nodes


I selected "Live Preview" so I can see how it looks. You can change the size of the font and the dots. Type in a different size to change. My samples changed automatically, if not, press Enter. You can continue to tweak it until it looks right for your project, select Apply. You will notice in my two samples they are different sizes. I need smaller ones for the second design.
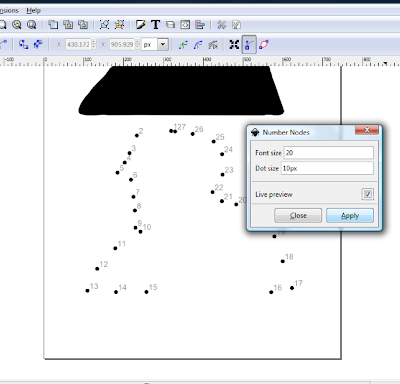


The only problem I noticed was the first and the last dot numbers land on top of each other in my second sample so after I created my image I ungrouped it to move my overlapping numbers. I haven't printed one yet but will do so soon.






Have fun!


Friday, May 13, 2011

Congrats! Congrads! Editing text in Inkscape 0.48

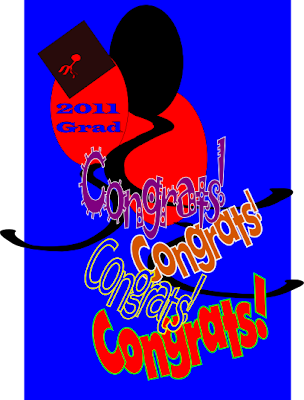
  I was practicing editing text in Inkscape 0.48 and wanted to share the end results as well as sharing how to move text around easily. The samples below show the text after moving it either closer, up and down or rotated.

The only rotation I did is on the bold red text and just the "C" and the exclamation are rotated. To do that, I select the text tool and type my copy. I use the arrow button to get over to the front of the letter I want to rotate and use alt key and [ to rotate counterclockwise and alt and ] to rotate clockwise. You will notice the letter seems to high and you will want to lower it so to move the text vertically (raise or lower)use the alt and arrow keys up or down. To move the text horizontally (closer or further apart) use the alt key and the arrow keys right or left.

The main advantage to doing this in the text mode is that you are able to save the spacing and try different fonts. I like to duplicate and have several on the page to see how I like them and in the samples below I decided to use several styles. When changing fonts it may need some additional adjusting to get the letters touching depending on the weight and style of the font. When saving to create a cuttable svg file...you need to change to go the the Path menu and select Object to Path. It will then show your line of text as a group (in status bar at bottom of the page) so then go to Object menu and Ungroup. Then back to the Path menu and use Break Apart. If you have letters with a center like o,p, d, a, etc., it will turn solid and you will have to draw around a box around the two parts of that letter with your select tool (the arrow) and in the the Path menu select Difference and the hole will be restored. (If the letter disappears, select Undo from the Edit menu. Go to the letter and select it again only the large part of the letter, hit the end button or go to the object menu and click on Lower to bottom then select the two parts again select Difference and the letter with its center should appear correctly). After working with the letters, I select the whole line and in the Path menu select Union. It may look unnecessary to do the break apart, difference and union because fter ungrouping, it looks like you should just be able to select union...but often importing into scal it will displace parts of the lettering so the extra steps seem to correct this. Occasionally there may still be a letter that doesn't look right. I'll go back again and select the whole line and try Union again. That does seem to be a snafu with 0.48 compared to earlier versions of Ink. If you have any trouble with these files please let me know! The picture below includes my words with an svg from Sandy on the scal (Sure Cuts a Lot) forum. She drew the graphic with the grad hat and balloons...that file is available here! There is another version she created in that post, too! Thank you Sandy!

File is here!
You will find both Congrats! and Congrads!
Congratulations if you survived reading this post!


Tuesday, May 10, 2011

Baby

Photobucket

BABY on a curve

In Sayings and Phrases (eighth post)

Star in a star

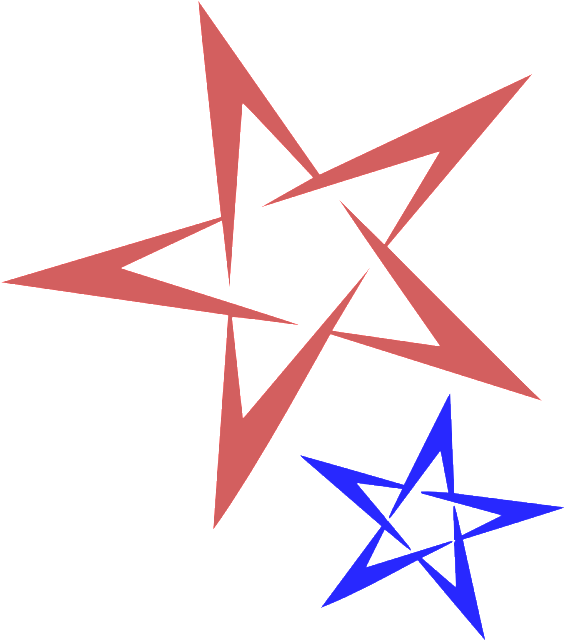
A file from playing with the star tool in Inkscape 0.48. I did do some editing but it gave me an easy start to create this design.

Photobucket

File here (4th post)

Monday, May 9, 2011

Inkscape 0.48 Illustrator's Cookbook - Star tool


So, I have been perusing the Inkscape 0.48 Illustrator's Cookbook which presents a number of fun design "recipes" but the ease and diversity of this tool will keep you mesmerized and feeling like a real artist. I decided to keep the files in black and white so the focus could be more on the variety of design options. Once you start it will be hard to stop!


If you are interested in this book you can find it here along with a link for a sample chapter to download at the top of the page. I will be sharing more as I try different tools from this book. And while there is a pdf version available I love having a real book in my hands so I have it at my side for easy reference. The side bar is where you can find the star tool and the shot below shows options that will appear at the top of the page. You can adjust how many corners you use. My samples range from four to six corners. As you click on some of the other options you will see your image change. Spoke ratio and Rounded will keep more symmetry to your drawings but using the Randomized will give it wildly different looks. It's all quick and easy!

TIP - You can reset your star by clicking on the paintbrush icon next to the Randomized button (thanks gj1 for pointing that out).


You can also change your image by grabbing the one of the two nodes and moving them around...it's a blast! You can also try holding the control key while dragging the nodes. It will bring out the Picasso in you!


Wednesday, May 4, 2011

More hatching...

I will move on...but I wasn't done playing!


Monday, May 2, 2011

Hatching Over a Photo or Image in Inkscape 0.48


I'm working my way through some of the "recipes" in the Inkscape 0.48 Illustrator's Cookbook so I was attracted to the potential with the Hatching Technique, something I used to do by hand with pen and ink.

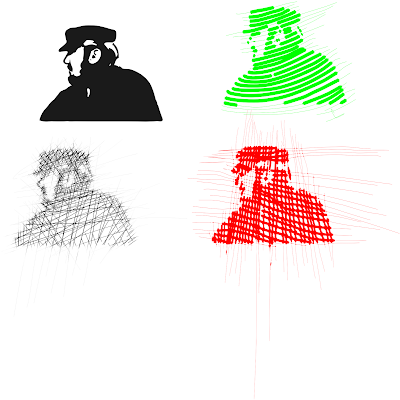
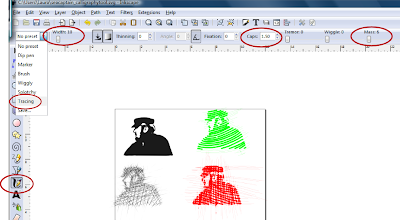
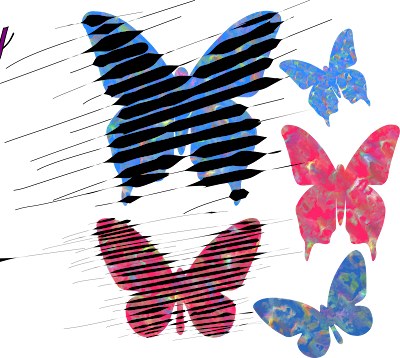
Import an image with high contrast to get the best results. My samples here include a black silhouette and some butterflies I had previously applied a pretty marble effect. The screen shot below shows the settings used. The lowest red circle on the left indicates where to find the Calligrapy tool and the other settings will appear at the top. First, you will need to open the drop-down menu and select "Tracing" and then you will set the Width which will vary depending on the effect you desire. In the samples here, I varied it from 1, 10 and 20. The Caps is set at 1.5 and the Mass at 6.


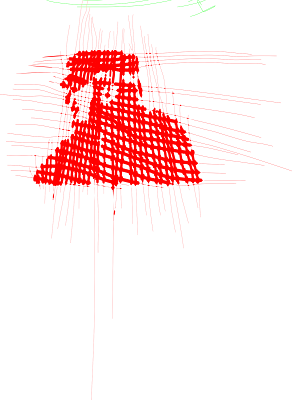
I'm really only stepping through the first part of the instructions. Width set a "1" here. In this sample I did a number of short strokes in several directions to create a stronger silhouette. Moving the photo away would let me see if I had enough detail. You can put it on a separate layer from your hatching and hide it, too.
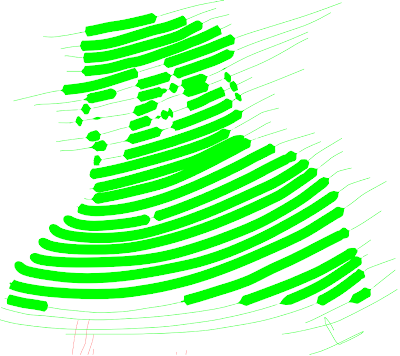
The thin lines outside the image show where I started drawing...as you go over the image the line thickens to produce the effects shown. Width set at "10" here.

After you draw the first line, you can hold the control button and see a small circle tracking across the line you've just made and it will follow the previous line to help you space your lines...well at least that's what the book said. I didn't find it was always willing to cooperate so you may prefer to take your chances and freehand it. You can edit each line and delete nodes and rotate to make adjustments in your drawing. There are additional instructions on using the Tweak tool but I found it a little tedious. However, having said that, compared to drawing by hand, it's definitely a feature I enjoyed using and will work with more. Width on this image is set at "20".


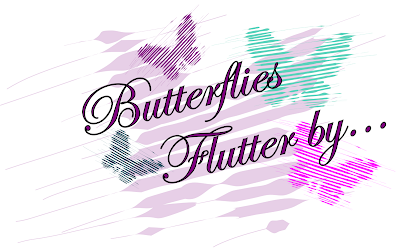
Some of the irregularity in the strokes of the butterfly is likely due to the color variations in the marble effect I was tracing over but it gives and opportunity to create a stylized look that can be used for a variety of projects. In the last picture I have grouped all my lines, duplicated them, change color and size and softened them by adjusting the opacity level so they were more translucent.


Give it a try and have fun!