Updated note 1/27/11 -Just a note for those who may just be finding this...my work has been done in Inkscape version 0.46 so if you have a different version there may be variations from what I've presented but there is a great Inkscape help site here called Inkscape Cutting Design...be sure to check it out!
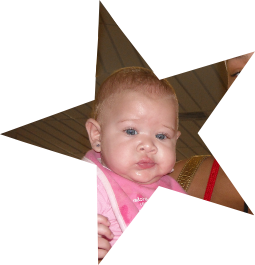
I've been playing with some files and wanted to use a picture of my great-niece, Leyana. So I cut out her picture and then added some copy and the star frame so I thought I would share the process of working with the picture in Inkscape.
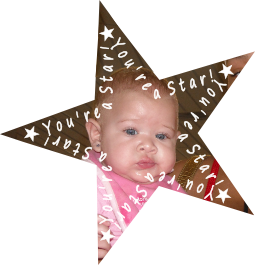

The file will include these elements (well, minus the cute photo! You'll have to supply your own)...however the star with the copy may be better for printing. The small star is the template I used for the picture cutout. File in Borders & Frames link in sidebar or here!

After importing the image I wanted to work with I need Inkscape to see it differently so I went to the Objects menu ->Pattern -> Objects to Pattern. This allows Inkscape to "see" the picture as a rectangle.

Then I go to Path menu -> Objects to Path.

Next I import the star file, size it for the image and ungroup the elements and bring the small star over the picture to cut out the part of the image I want to use.

Select both objects and go to Path menu -> Division

 Now because the area I wanted left me with a chopped off point on my star I went into the node edit to correct that.
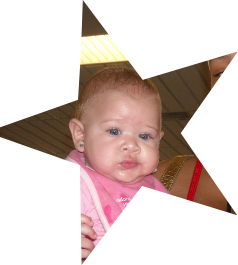 Also I didn't really like the glaring light above her so I duplicated the picture, drew a shape with the pen over another part of the ceiling, selected both and went to Path->Division which gave me just that small ceiling area that I could rotate and edit to block the light above Leyana.
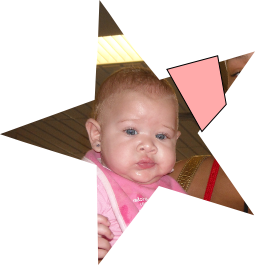
Here was the end result! (Isn't she adorable?!) And as shown above, there are some additional ways to frame her with the dark star or the lighter copy over the picture.
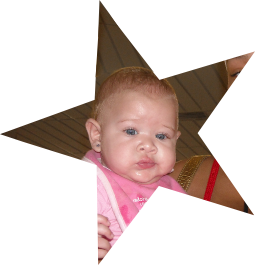
The text only file will be included as well.

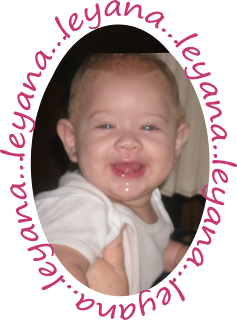
A similar idea done here with an oval and personalizing with her name...several offer tuts on making text fit a shape...it's a great way to personalize a card!

I've been playing with some files and wanted to use a picture of my great-niece, Leyana. So I cut out her picture and then added some copy and the star frame so I thought I would share the process of working with the picture in Inkscape.


The file will include these elements (well, minus the cute photo! You'll have to supply your own)...however the star with the copy may be better for printing. The small star is the template I used for the picture cutout. File in Borders & Frames link in sidebar or here!

After importing the image I wanted to work with I need Inkscape to see it differently so I went to the Objects menu ->Pattern -> Objects to Pattern. This allows Inkscape to "see" the picture as a rectangle.

Then I go to Path menu -> Objects to Path.

Next I import the star file, size it for the image and ungroup the elements and bring the small star over the picture to cut out the part of the image I want to use.

Select both objects and go to Path menu -> Division

 Now because the area I wanted left me with a chopped off point on my star I went into the node edit to correct that.
 Also I didn't really like the glaring light above her so I duplicated the picture, drew a shape with the pen over another part of the ceiling, selected both and went to Path->Division which gave me just that small ceiling area that I could rotate and edit to block the light above Leyana.
Here was the end result! (Isn't she adorable?!) And as shown above, there are some additional ways to frame her with the dark star or the lighter copy over the picture.

The text only file will be included as well.

A similar idea done here with an oval and personalizing with her name...several offer tuts on making text fit a shape...it's a great way to personalize a card!


What a great idea Laura. Thank you for the instructions. I will try this one for sure. BTW Leyana is gorgeous.
ReplyDeleteCarolyn
I'm back. I tried this and it is so easy to do. Thank you once again for easy to follow instructions.
ReplyDeleteThanks for your posts and kind words, Carolyn! I'm happy to know it was easy to follow. So many of you do such wonderful lessons for the rest of us...I'm glad I had something different to share!
ReplyDeleteLaura, thank you so much for the clear instructions on this. I have some great pictures of my Granddaughter playing High School Basketball. We want to cut her out of the photo and then I will convert it so that a black silhouette of her can be cut from vinyl. Will your technique work the same if I create the shape by outlining her shape on the photo instead of using a shape from the file??? If you have any further information that I should know to do this, I would appreciate you sending it to me as soon as possible. Thank You, Linda gtwngs@yahoo.com
ReplyDeleteYour tutorials are well thought out. Thanks. Your baby is adorable!
ReplyDeletecricutcard-iologist.blogspot.com
Thanks Linda and Laura...and Linda I hope your project worked out well for you!
ReplyDeleteThis is another great way of playing with photo's.
ReplyDeletethanks so much.
SusanE
http://papasuecreative.blogspot.com
Thanks, Susan...you share so much! Glad you found this useful!
ReplyDeleteThanks a lot !!! dear Laura. I've been searching for 5 hours for such wonderful and useful cut-out tutorial. Do You have some website with Your Inkscape experiences ? Thank You one more time :D
ReplyDeleteVlasta, (Czech Republic)
sobotka.vlastimil@email.cz
Now I found it on Your main page :DDD
ReplyDeleteThank you Vlasta...please note my update at the top of this post!
ReplyDelete