Monday, December 28, 2009

Name cards and bookmarks


I had another request for some personalized name cards and bookmarks...and I'm happy to provide them for others...feel free to email me at laura@thealliancetrader.com and I'll get to them as soon as I can. I have some earlier posts on my blog that show others I've done and a link to video by dan99 on how to make them yourself if you care to try.
April 2009 post

(Updated list July 2010)
The following bookmark names available:
Amber
Avery
Bruce
Chris
Cooper
Cortni
Crystal
Curtis
Dawn
Delores
Destiny
Donna
Graydon
Giulia
Heather
Hilary
Irene
Izybel
Jamie
Jim
Jenna
Jennifer
Joni
Karis
Kendall
Matthew
Michelle
Laura
Layne
Lexi
Lisa
Martha
Nancy
Nicholas
Nick
Norma
Rosemary
Sally
Tabby
Timothy
Wanda
Wenonah


Bookmarks here (4 pages)

Photobucket


Photobucket
These names are available in an Aperture Name Card:
Amber (page 2)
Andy (page 3)
Arturo
Carmen
Cortni (page 2)
Crystal (page 2)
Curtis
Danyelle (page 3)
Dawn (page 2)
Destiny (page 2)
Donna
Ginnie
Hilary (page 2)
Izybel (page 2)
Jamie (page 2)
Jennifer
Joni
Kendall (page 2)
Layne (page 2)
Lisa (page 3)
Maria
Martha (page 2)
Matthew (page 2)
Michelle
Nancy
Nick (page 2)
Nicholas (page 2)
Norma (page 2)
Rosemary (page 3)
Sharon (page 3)
Sookie
Tabby
Wanda (page 3)
Wenonah (page 3)
Zonia


Link here. (Updated list July 2010)

Wednesday, December 16, 2009

Coffee graphics and sayings

Feeling a need for more motivation while under the weather perhaps drove my latest batch of coffee related sayings...and apparently I was in a little retro mood, too!

Link here!


It would be easy to personalize, too!


Friday, December 4, 2009

More photos and shapes with Inkscape


In the style of my previous post this was done following those directions for a photo cutout. My brother and his wife had a Shrek theme at their wedding so it seemed only fitting to do a little morphing to suit the occasion.

Link here...again though the text is a little fine for cutting and tedious but this could be nicely suited for customizing and printing a card...


Wednesday, December 2, 2009

Photo cutout in Inkscape

Updated note 1/27/11 -Just a note for those who may just be finding this...my work has been done in Inkscape version 0.46 so if you have a different version there may be variations from what I've presented but there is a great Inkscape help site here called Inkscape Cutting Design...be sure to check it out!


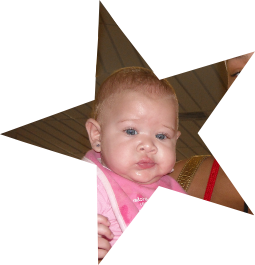
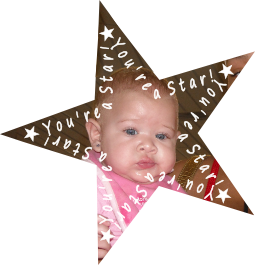
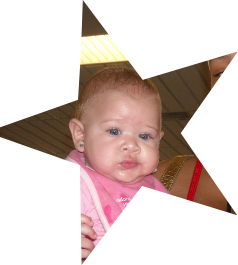
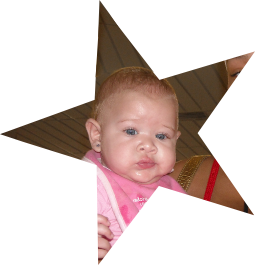
I've been playing with some files and wanted to use a picture of my great-niece, Leyana. So I cut out her picture and then added some copy and the star frame so I thought I would share the process of working with the picture in Inkscape.


The file will include these elements (well, minus the cute photo! You'll have to supply your own)...however the star with the copy may be better for printing. The small star is the template I used for the picture cutout. File in Borders & Frames link in sidebar or here!


After importing the image I wanted to work with I need Inkscape to see it differently so I went to the Objects menu ->Pattern -> Objects to Pattern. This allows Inkscape to "see" the picture as a rectangle.


Then I go to Path menu -> Objects to Path.


Next I import the star file, size it for the image and ungroup the elements and bring the small star over the picture to cut out the part of the image I want to use.


Select both objects and go to Path menu -> Division


Now because the area I wanted left me with a chopped off point on my star I went into the node edit to correct that.

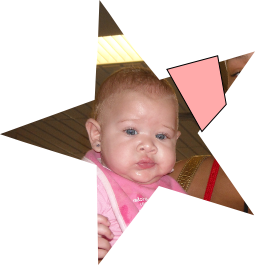
Also I didn't really like the glaring light above her so I duplicated the picture, drew a shape with the pen over another part of the ceiling, selected both and went to Path->Division which gave me just that small ceiling area that I could rotate and edit to block the light above Leyana.


Here was the end result! (Isn't she adorable?!) And as shown above, there are some additional ways to frame her with the dark star or the lighter copy over the picture.

The text only file will be included as well.


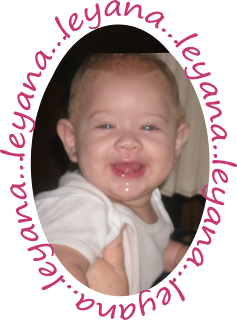
A similar idea done here with an oval and personalizing with her name...several offer tuts on making text fit a shape...it's a great way to personalize a card!


Saturday, November 21, 2009

Life is not measured...


Here are some files with this beautiful saying. I couldn't decide which one I liked best so I decided to post all of them! The files are here. All three included in zip file.

Friday, November 13, 2009

Pillar Design

Finally I have some time to post this file...it's not really complicated but I'll step you through the construction...file is here.

Photobucket

Photobucket

This pic shows where you need to fold.
Photobucket

Photobucket
Glue each of the sides as shown and fold tabs in.
Photobucket
Photobucket
Photobucket
Photobucket

Photobucket
Photobucket
Photobucket
Tuck into first part
Photobucket

Photobucket
I took the two squares and lay them over the
larger piece to give me a guide for fold lines.
I use the two pieces to stabilize the platform.
When I did my first pillars without the outer wrap
they were prone to warping so this seems to make
it more stable and gives the edge a nicer finish.
Photobucket
Photobucket
Photobucket
Photobucket
Photobucket
Center and glue pushing through hole to
secure it while gluing.
Photobucket
Photobucket
You can play with different heights for your pillar
and if you don't want to permanently glue it you
could try using the hair bands to hold your pillar together.
Photobucket
Photobucket
You could add the wide
platform at the base of the
pillar, too. It would, of course,
require another sheet of paper.

Photobucket