Thursday, November 17, 2011

Faux Door Knob Plate


I noticed in someone's home a door knob plate had been added to a bedroom door complete with skeleton key hole and it seemed to add a simple charming touch so it sparked the idea for this file (doesn't take much for me!) so perhaps this will give you some fun ideas to run with, too!

The sample on the left is the basic shape (minus the monogram) provided in my zip file, one with the keyhole and one without. The rectangular sample was something I did in Inkscape just to inspire some other options.

After cutting samples, I embossed them with my Cuttlebug and then added a bronze ink.

I wanted to use one in my office on the outside of the bathroom door in the so I took the door knob off, found the center of my paper and decided approximately where I wanted to put it. I held the sample to the hole on the door so I could poke the in the center (with my screwdriver) then slipped it over the knob hardware and pressed it gently to get an impression for the area to be cut away. The size of my plate is 3 1/2" x 9". I glue it on with rubber cement.


It could be fun to make a space just for an initial or name at the bottom, too. Have fun! The link is here!

Thursday, October 20, 2011

Onsie Favor Box - modified


This design was based on a request a few months ago. I was asked about creating a larger base approximately 2 inch square for extra goodies. I found the mini size paper cups worked well.

The file is now available where the other onsies are located. You'll have to scroll down to the last post for it which is about the thirteenth. File link here!

Teo shared a photo of hers which is included and I love seeing pics so please send them along! Thanks, Teo!

The little flowers are from a Martha Stewart punch.
It makes it easy to utilize my paper and be all matchy-matchy!
I squeezed 2 up by using the "keep proportions" box and setting the height to 10.8" in my scal program.

Teo's onsies are below. She emailed and told me she made fifty! She said, "They were the perfect size for 4 pieces of Fannie Mae Mint Meltaways in their own little paper cups, and they were a big hit!"

Monday, October 3, 2011

Layered Dimensional Stars

These sets show some possibilities for layering stars for a fun and unique look! Some are full stars layered and some are cutouts which allow the paper underneath to show through. Doing that extends the use of your paper.

I have found I prefer to separately fold the layers instead of gluing them and then doing one fold. One advantage is that you can move your elements around until your happy with the look. Another is that if you have not glued the star on centered correctly, that will show up when you go to folding it...so I glue at the end when I've chose placements of colors...hope this will inspire you to create some fun color and pattern combinations!


An earlier post show how to fold the stars for a more dimensional looks check my "stars" Label to find those posts...have fun!

Friday, September 30, 2011

Pretty as a Peacock...the continuing story.


This file is inspired by a beautiful piece of art in our local Curiosity Shop at The Alliance Trader building. We bought this piece over a year ago and many, many admirers have wanted it. I shared it last year on my other blog, Designs by Laura.


My frequent response when asked if it's for sale is, "No, but you have excellent taste! And you may come visit it anytime we're open and you're in town!

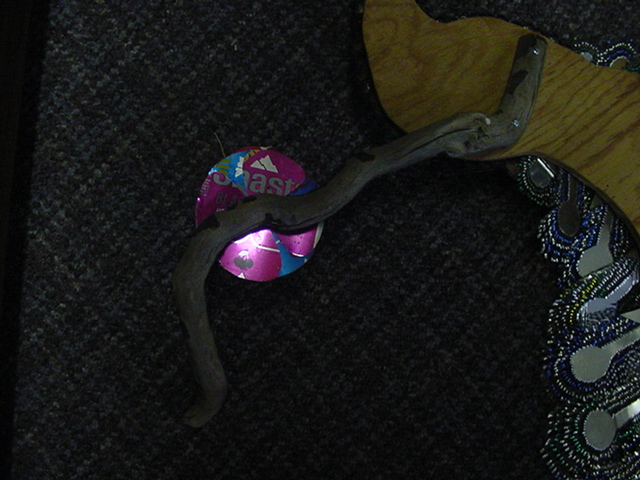
More than one has examined it and taken pictures in a desire to recreate this piece which was made from Shasta soda pop cans.


So, it was my inspiration for this fun and comparitively simple design. It's a 3 part layered design and I think I will have fun playing with it and I hope you do, too! The file is here.


The additional photos are provided for the artistic folks who have come into our shop and want to try and make something similar. It's an ambitious project and I hope they will share pics!


The body has some depth to it. From what I can see it appears to be some wood pieces shaped and attached to the main piece of wood. The depth does add to the beauty and realism of the bird.


This was one of the "feathers" which was nailed on. Some are longer, some shorter...hope this helps those who are taking this project on!


Saturday, September 10, 2011

Little Butterflies and Inspirational Girls


I have a new display in our Curioity Shop at The Alliance Trader. I've been filling some beautiful little bottles with bath salts and thought it would be fun to incorporate some little butterflies from the files I've shared earlier. I also thought it would be a nice option to present some Inspirational Girls along with the bath salt containers. Perhaps it will give you some ideas...and if you missed the previous blog posts, the girls can be found here and the butterflies here!


This great dessert glass is perfect for some bath salts and a bath scrunchie. I threw in the straw for effect! What a fun way to give a bath treat...just don't eat it!
Here is a vintage beauty!


The bath salts are scented with either lavender or eucalyptus so the shop is smelling especially fragrant, too!

Saturday, August 13, 2011

More Origami Money Folding

So, I had a request to do a flying dragon with a $5o dollar bill for a donation presentation so thought it would be fun to show it with the regular dollar bill version. Also have a couple of other folds I've done.


Notice the doggie eye and mouth in photo above!


The fifty is on the right side.


A quarter nestled in a heart-shaped dollar bill.


Wednesday, August 10, 2011

Dollar Bill Origami

Well, for those who try to follow my blog...my apologies for the lack of posting. We have been swamped with a new furniture consignment shop and our own Curiosity Shop next door to it. So these little projects seemed fitting for our Curiosity Shop. I had a call requesting a dragon and frog out of a dollar bill so that led to a few new folds for me and I threw in some earlier ones, too.

Do a Dollar Bill Origami search to find some great artists out there!
Maybe this will inspire you to explore this unique artistic expression!


I call this one shirt 'n chaps. One dollar for the shirt and one for the chaps.

Frog
Cancer Ribbon
Flying Dragon (isn't he a cutie?!)


Bats!