
My last post showed a silhouette I created using a photograph in Inkscape and made an svg file. I will try to outline the steps I took to do this...there are perhaps easier ways but this is how I proceeded.
Update-(2/2/2011) A reminder...this was done in Inkscape 0.46 so if you have a newer version there may be some variances in the menu...a great forum available for Inkscape tutorials is Inkscape Cutting Design
After importing the photo, select your image,(it will have little arrows around it) by clicking on it or using the select pointer from the sidebar. From the Path drop down menu select 'Trace Bitmap' .
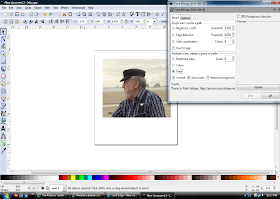
In the trace bitmap window, I select 'Grays' (though you may prefer colors) from the Mode menu under Multiple scans. Mine defaults at 8 scans. I leave it there and select 'Update'. The image will appear in the small preview window. Then, select 'OK'. Your photo will change to a grayscale image. (I then click on the red X to close the trace window).
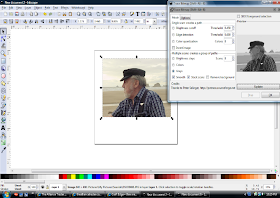
Select the image, the go to the 'Objects' menu and select 'Ungroup'. A box will appear around each layer of scans, 8 in total.
Click outside the image and then back on the image and you can select the individual scans. I separated them and deleted all except one that I felt would work best.
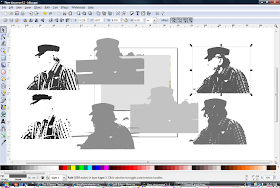
I turned the saved scan black.
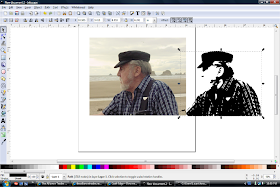
I overlay the picture to use as a reference but at this point I also use the 'Simplify' from the Path menu
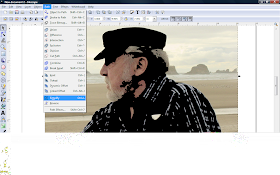
As noted below this greatly reduces the number of excess nodes in my image (you can 'Undo' from the Edit menu if you don't like the results)

I'm not interested in having all the detail from the shirt so I draw circles and squares (from sidebar menu) to block the excess nodes anc create and more solid image. From the Path menu I select 'Object to Path' to convert the shapes to a path. (You can select them all at once or individually).
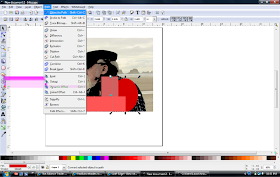
Here I select all the elements including my black photo scan and from the Path menu, select 'Union' which will unite all the elements into one unit that you can further edit. All the elements turn black.
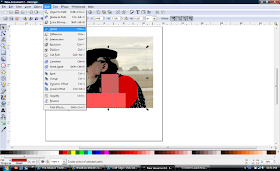
Here I select the 'Draw Freehand lines' tool from the sidebar.
I magnify the image and draw in the areas I want to give more definition (which is why the original photo is still there) and areas in the shirt that still need to be made solid. I could have just drawn a freehand box around the shirt rather than bother with the boxes and circles in the earlier step, too. This shot show the main black image in the 'Edit node' mode so I can see how many excess nodes will be eliminated once I add these elements. As before, I select all of the elements, go to the Path menu and select 'Union' and I get a single image that I can continue delete or move nodes on until I'm satisfied with the image.
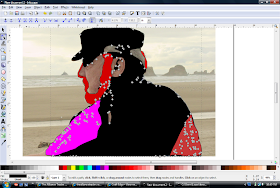
The finished product! Svg file here.


Fantastic job....it came out excellent..thanks for taking the time to show me the steps..im really lost in inkscape trying to convert and play w/cricut........many smiles
ReplyDeleteThanks for your comment! If I can help in some way please let me know...
ReplyDeleteI followed your instructions but I am having trouble when I try to edit the picture with object to paty. It does not combine and the boxes that I draw in do not stick with the pictu
ReplyDeleteIn this particular tutorial I am working from a tracing of the picture and overlay the trace on the picture for reference.
ReplyDeleteIf you are looking to work directly with the picture, then my other post may accomplish what you are trying to do.
Photo cutout in Inkscsape
You may also email the file and I can take a look at it, too.
I was trying to follow your steps. I emailed you one of the photos I was working with,
ReplyDeleteThanks for the tutorial! I'm surely going to try this out!
ReplyDeleteSmriti,
ReplyDeleteHave fun...note an update at the beginning of this post regarding a helpful forum for Inkscape, too! They can answer lots of questions and have some great tutorials!
Thanks for visiting my blog!
How do I make a stencil?
ReplyDeleteThe finished product here could easily be cut as a stencil. Of course, you need a cutting machine. I have a link for the svg file above in my post between the last two pictures. You may need to convert the file to another format depending on your machine.
ReplyDelete